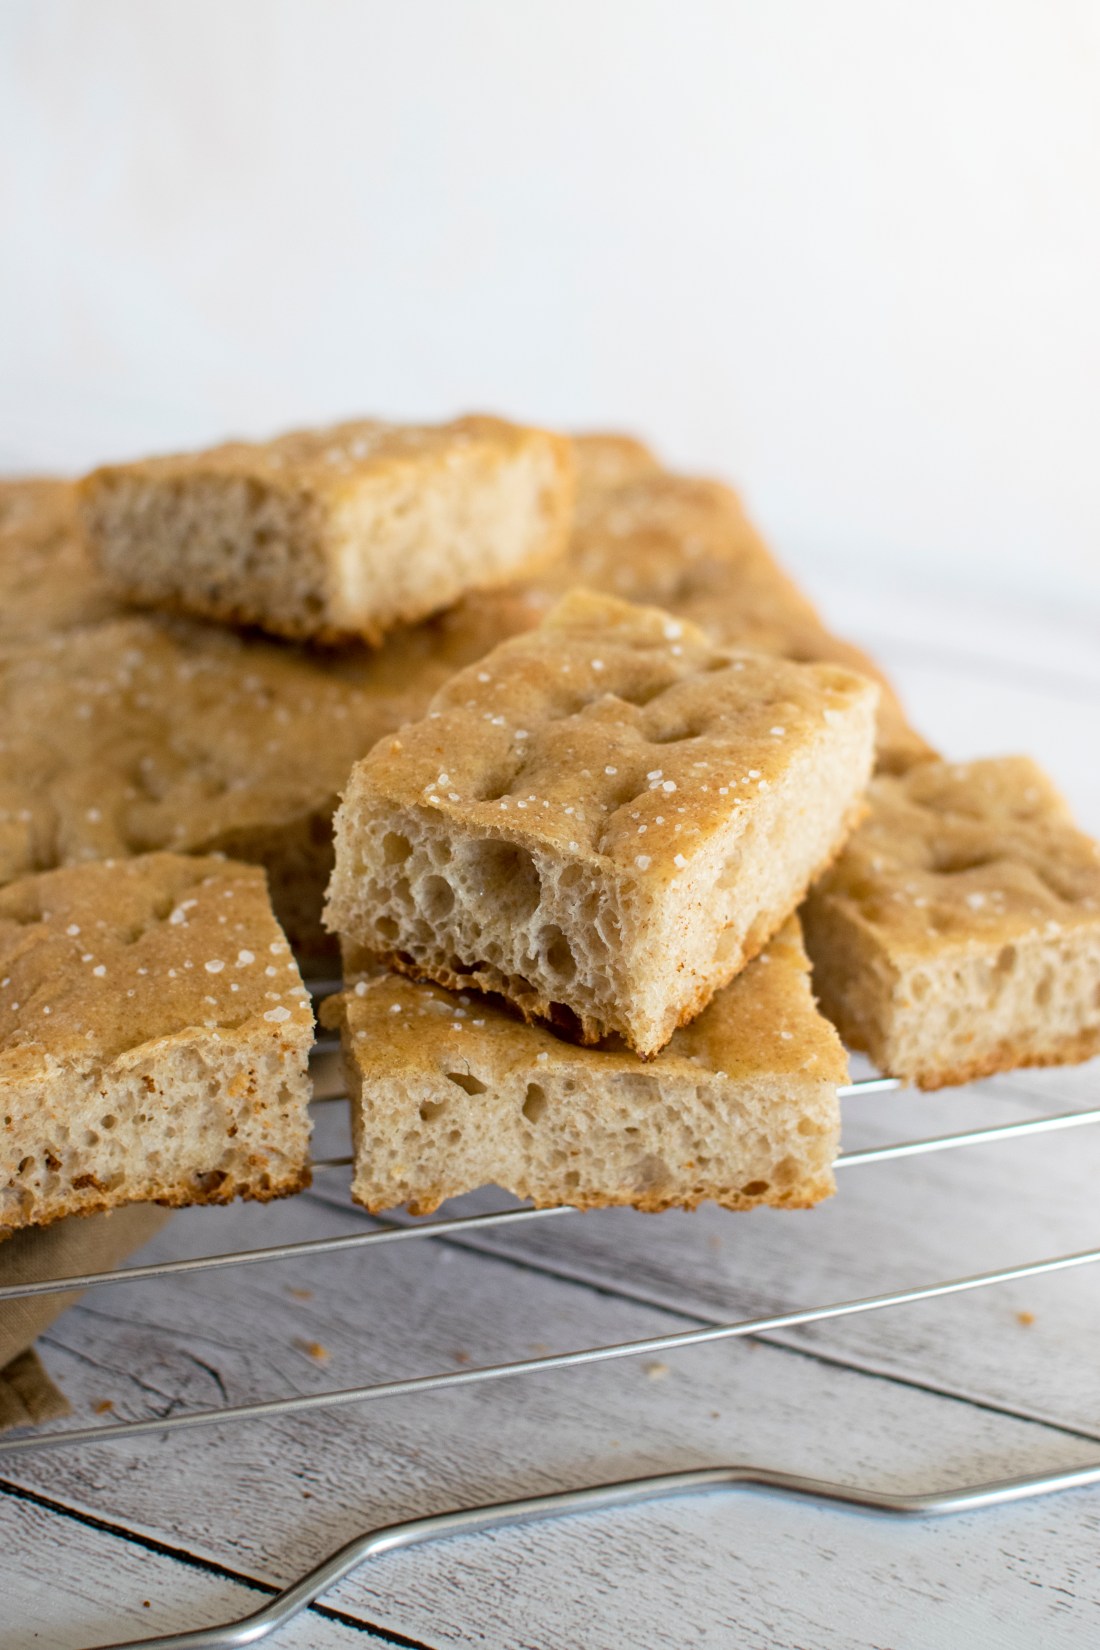
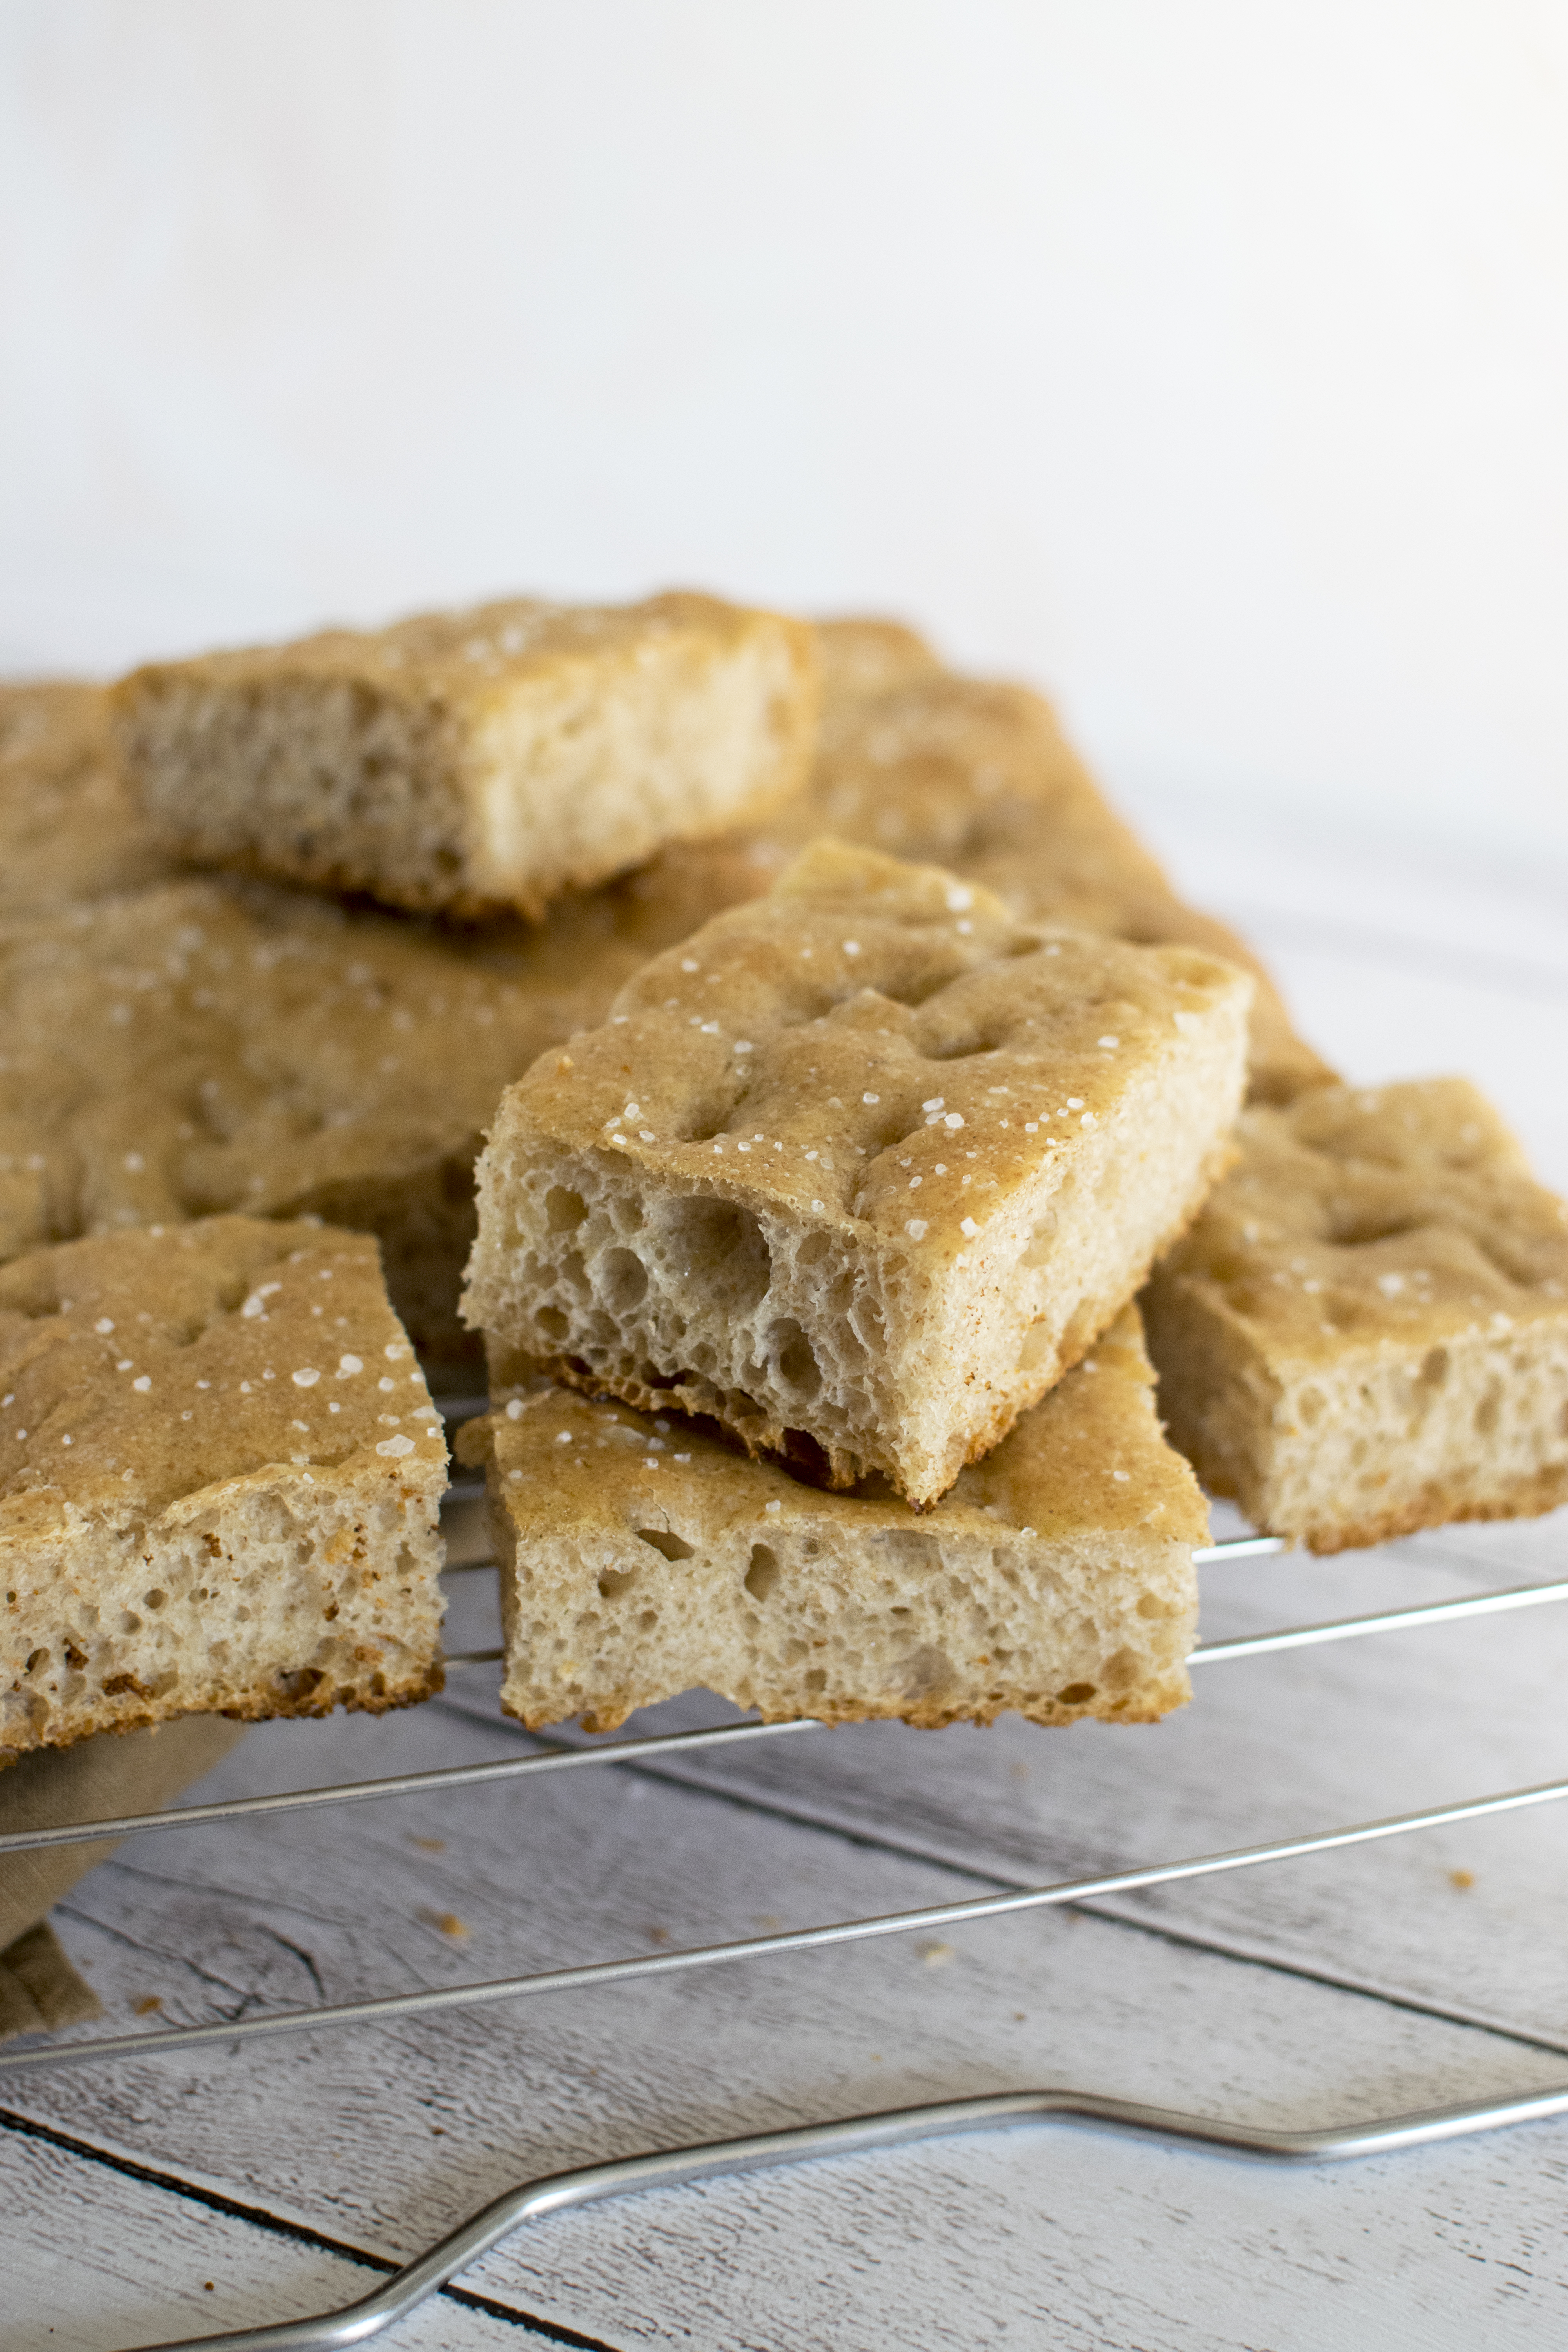
Lately I’ve been making focaccia quite a lot. I admit, I have made quite a few with just a sprinkle of salt on top just because this was easier for me than making bread. Focaccia does not imply any shaping, which for me saves quite a lot of time and effort. Also, being a flatter bread, it means that I can benefit from the delicious crust more. Now, leaving my nonsense aside, let’s talk about how to get this amazing texture and bubbly crumb on your focaccia.
This is a recipe that uses yeast. I am currently trying to make a new sourdough starter, so I will come back with a recipe when I will manage to play around with that, but until then, you can achieve a very nice texture using yeast, but you have to adjust the technique a bit.
Ingredients:
- 523g flour (I used 423g Caputo Manitoba + 100g whole wheat flour)
- 400g tepid water
- 7g salt
- 4g dry yeast
Method:
- It is at easy at it can be: put all of the ingredients in a bowl and start mixing by hand. Make sure that there is no dry flour. This will be quite a wet dough, so the best way in which you can “knead” this is to use the Rubaud method. To put it in to words, you will slide your hand underneath the dough, and you will rotate the palm, in a similar way that a mixer would beat the dough. If you can’t or don’t want to do this, you can only rely on stretch and folds (the long fermentation process allows this).
- After about 15 mins, it is time for the first stretch and fold. To do this, wet your hands, and bring the margins of the dough in the center. Basically you are folding it inwards. This will help with the gluten development. In about 15 mins repeat this step, and make about 2-4 of these.
- When you are done with the stretch and folds, put the dough in a container that has a lid. Make sure it is big enough. As a guidance, the volume of the container should be three times bigger than your dough.
- Now, if you want to get a really nice bubbly result, and flavour development, you want to pop the dough in the fridge overnight, or for 8 to 12 hours. You can obviously just let it proof for 2 hours and you will still get a delicious and beautiful result, mostly if you chose the right flour, but I prefer the overnight method. It makes my life easier, I can make it before bed, pop it out when I wake up, and also, the texture of the focaccia in the end is always way better and closer to a sourdough version.
- Note: If you want to let the dough proof at room temperature for an hour and a half or two, I would advise placing the dough directly in the tray after you finished the stretch and folds. You will want to keep as much air as possible in that dough, so moving it around after, may influence your results.
- Another note: cover your dough with a little bit of olive oil before letting it proof. This will not only help prevent drying, but it will also help when we need to remove it from the container.
- After the dough has proofed in the container, in the fridge, it is time to remove it from the container and place it in a tray.
- Oil the tray, I prefer olive oil for this. Optional: you can sprinkle some semolina on the bottom of the tray.
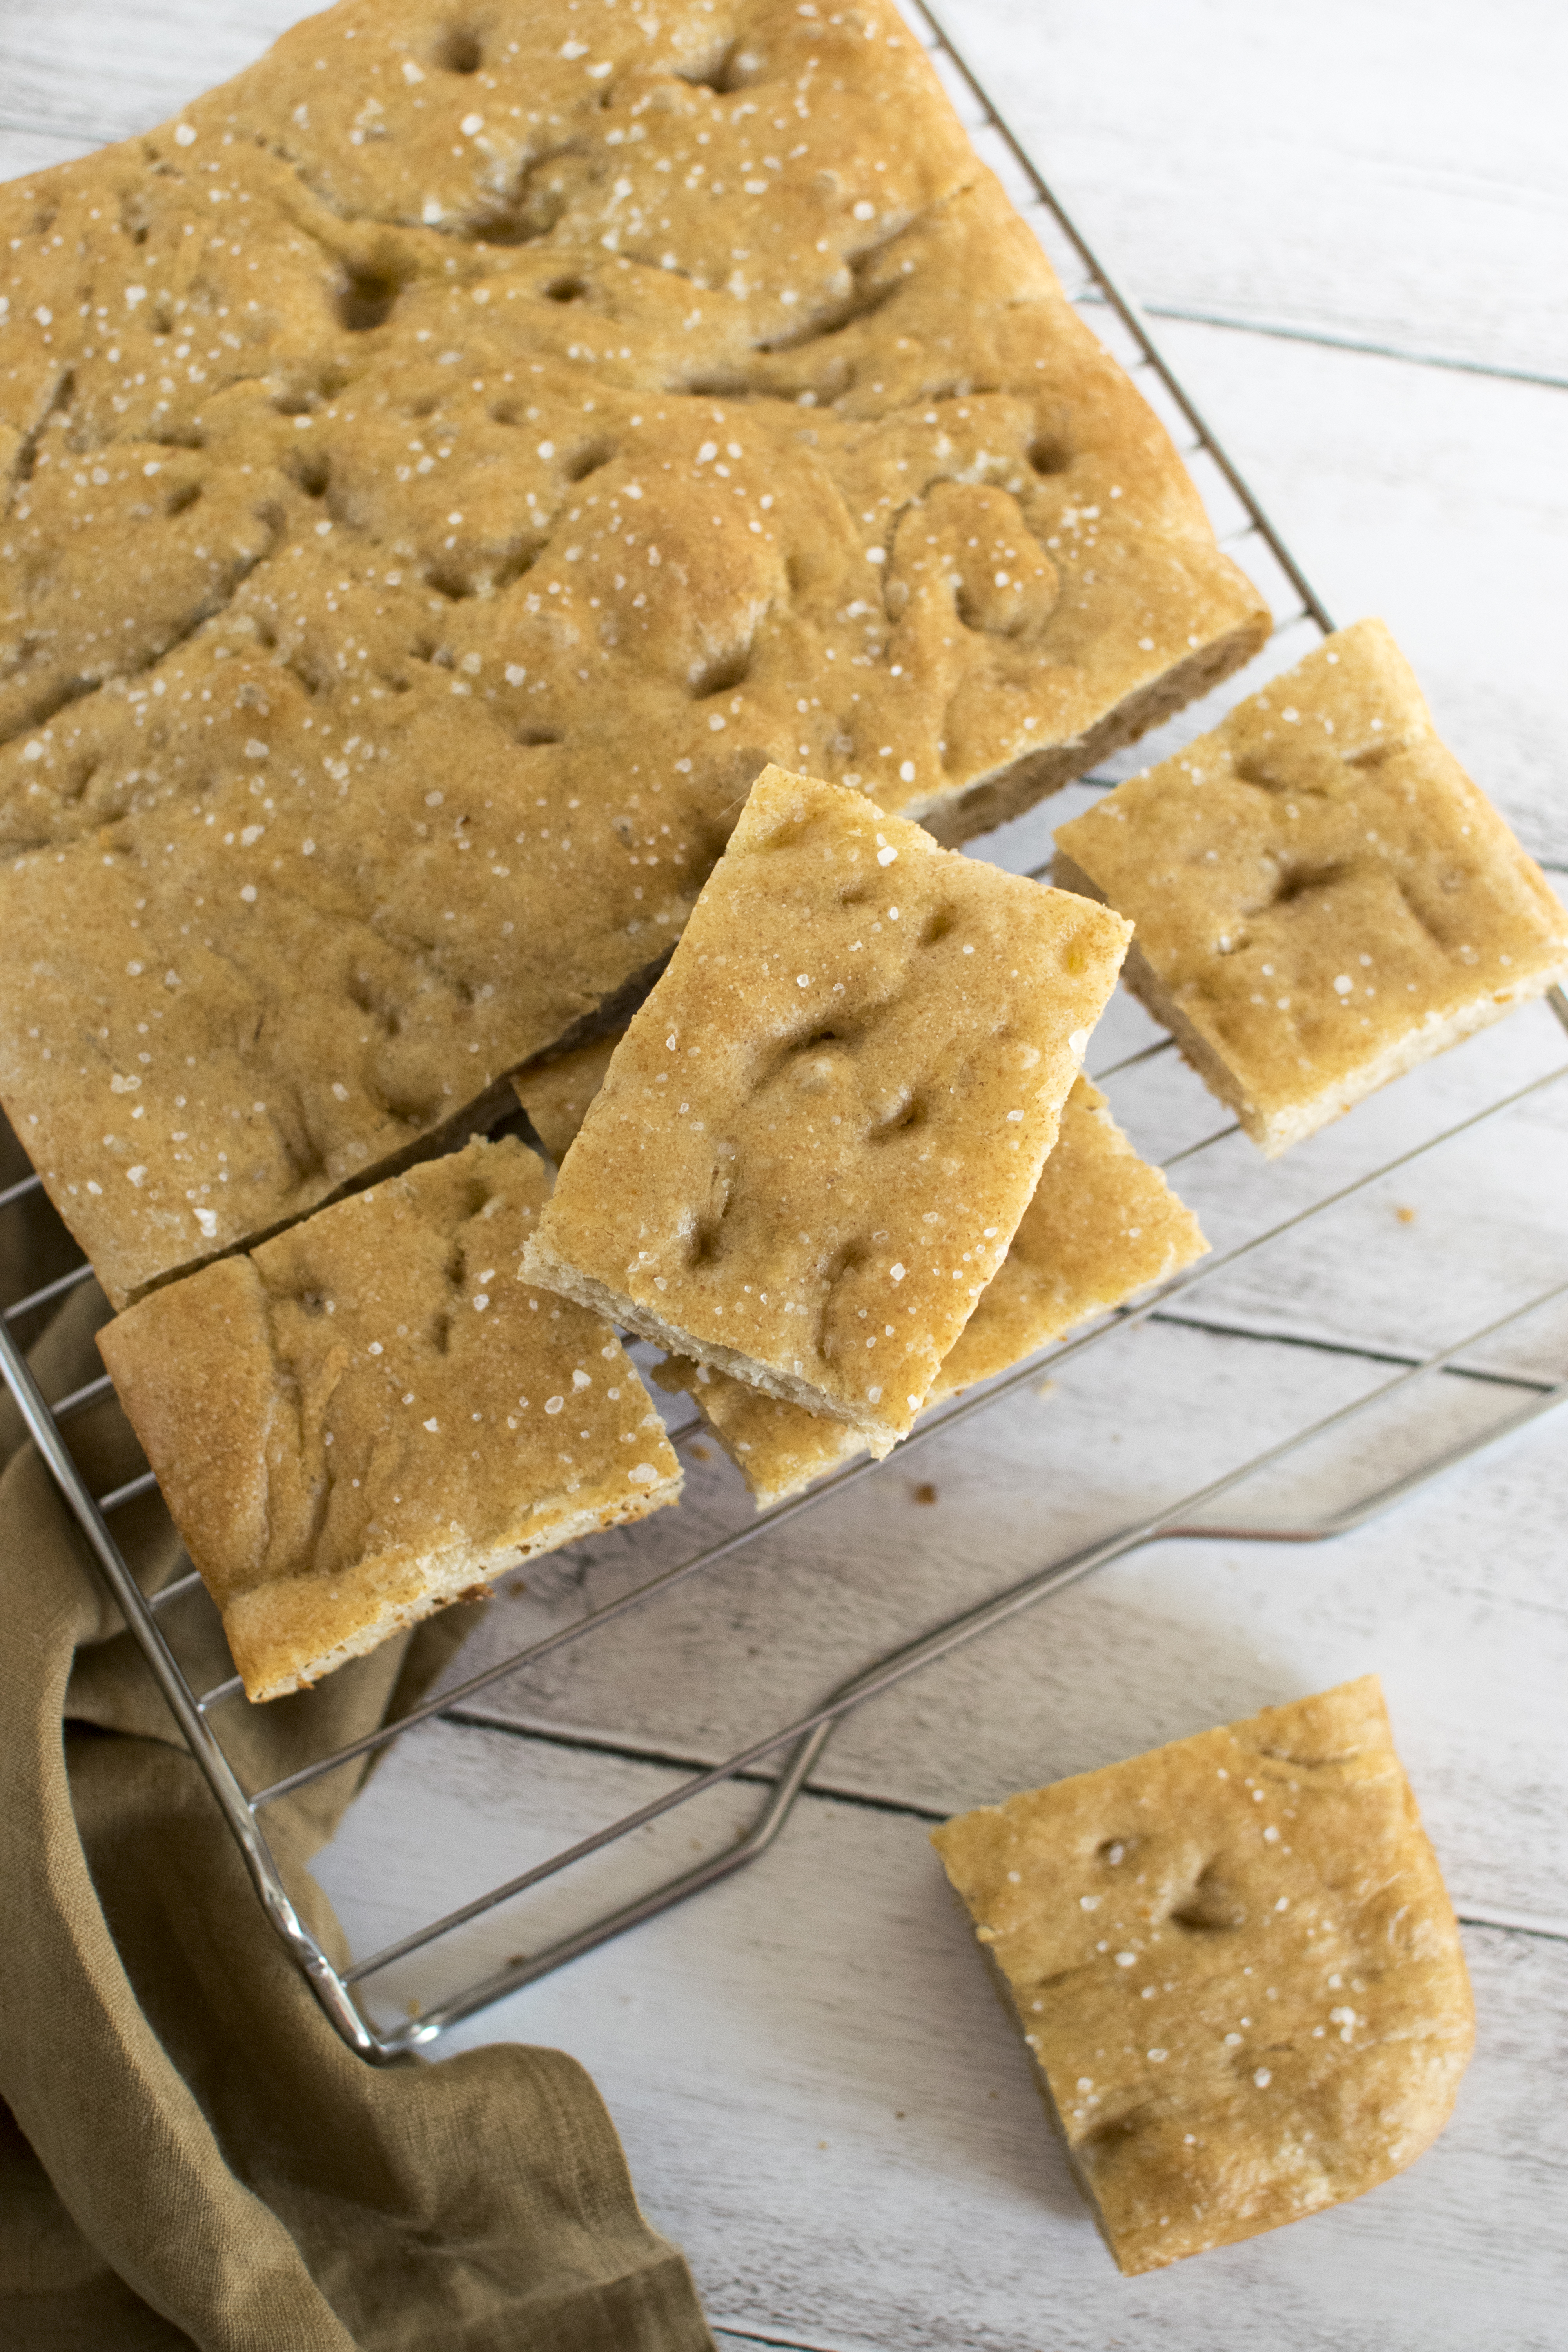
- Carefully remove the dough from your container, and place it in the tray. Spread the dough gently so that it covers the bottom of the tray. Cover with plastic wrap or with a damp towel and let it sit for 1 to 2 hours, depending on how warm is your kitchen. The dough will puff up , spread a bit of olive oil on top and make the dimples if you want to.
- When it comes to toppings, if you just want to add salt, it is the time to sprinkle some. I like this version when I want to use it as a side instead of bread, or when I want to make sandwiches out of it. You can obviously add herbs, one of my favorite combinations is with rosemary and oregano, and maybe a touch of basil, or you can add cheese, tomatoes, anything. If you choose to use toppings that are heavier, like tomatoes, add them before the 1-2 hour rise, this way you will avoid any unwanted deflating of the dough.
- Preheat the oven at 220°C.
- Add the focaccia in for 30 mins.
- How to check if it is baked inside? Raise it from the tray and knock on the bottom. If it sounds empty, it’s baked inside.
Tips:
- You can use just one type of flour, but try to find one that has a higher protein content (this is why I use Caputo Manitoba, it has 14g of protein per 100g, but anything like 10.5 or 11 should work fine as well).
- The Rubaud method and the stretch and folds help with gluten development. This will ensure that you will have a strong enough gluten bond that will keep the air inside the dough.
- I start the kneading directly in the container in which I will proof the dough just to save some time on the washing.
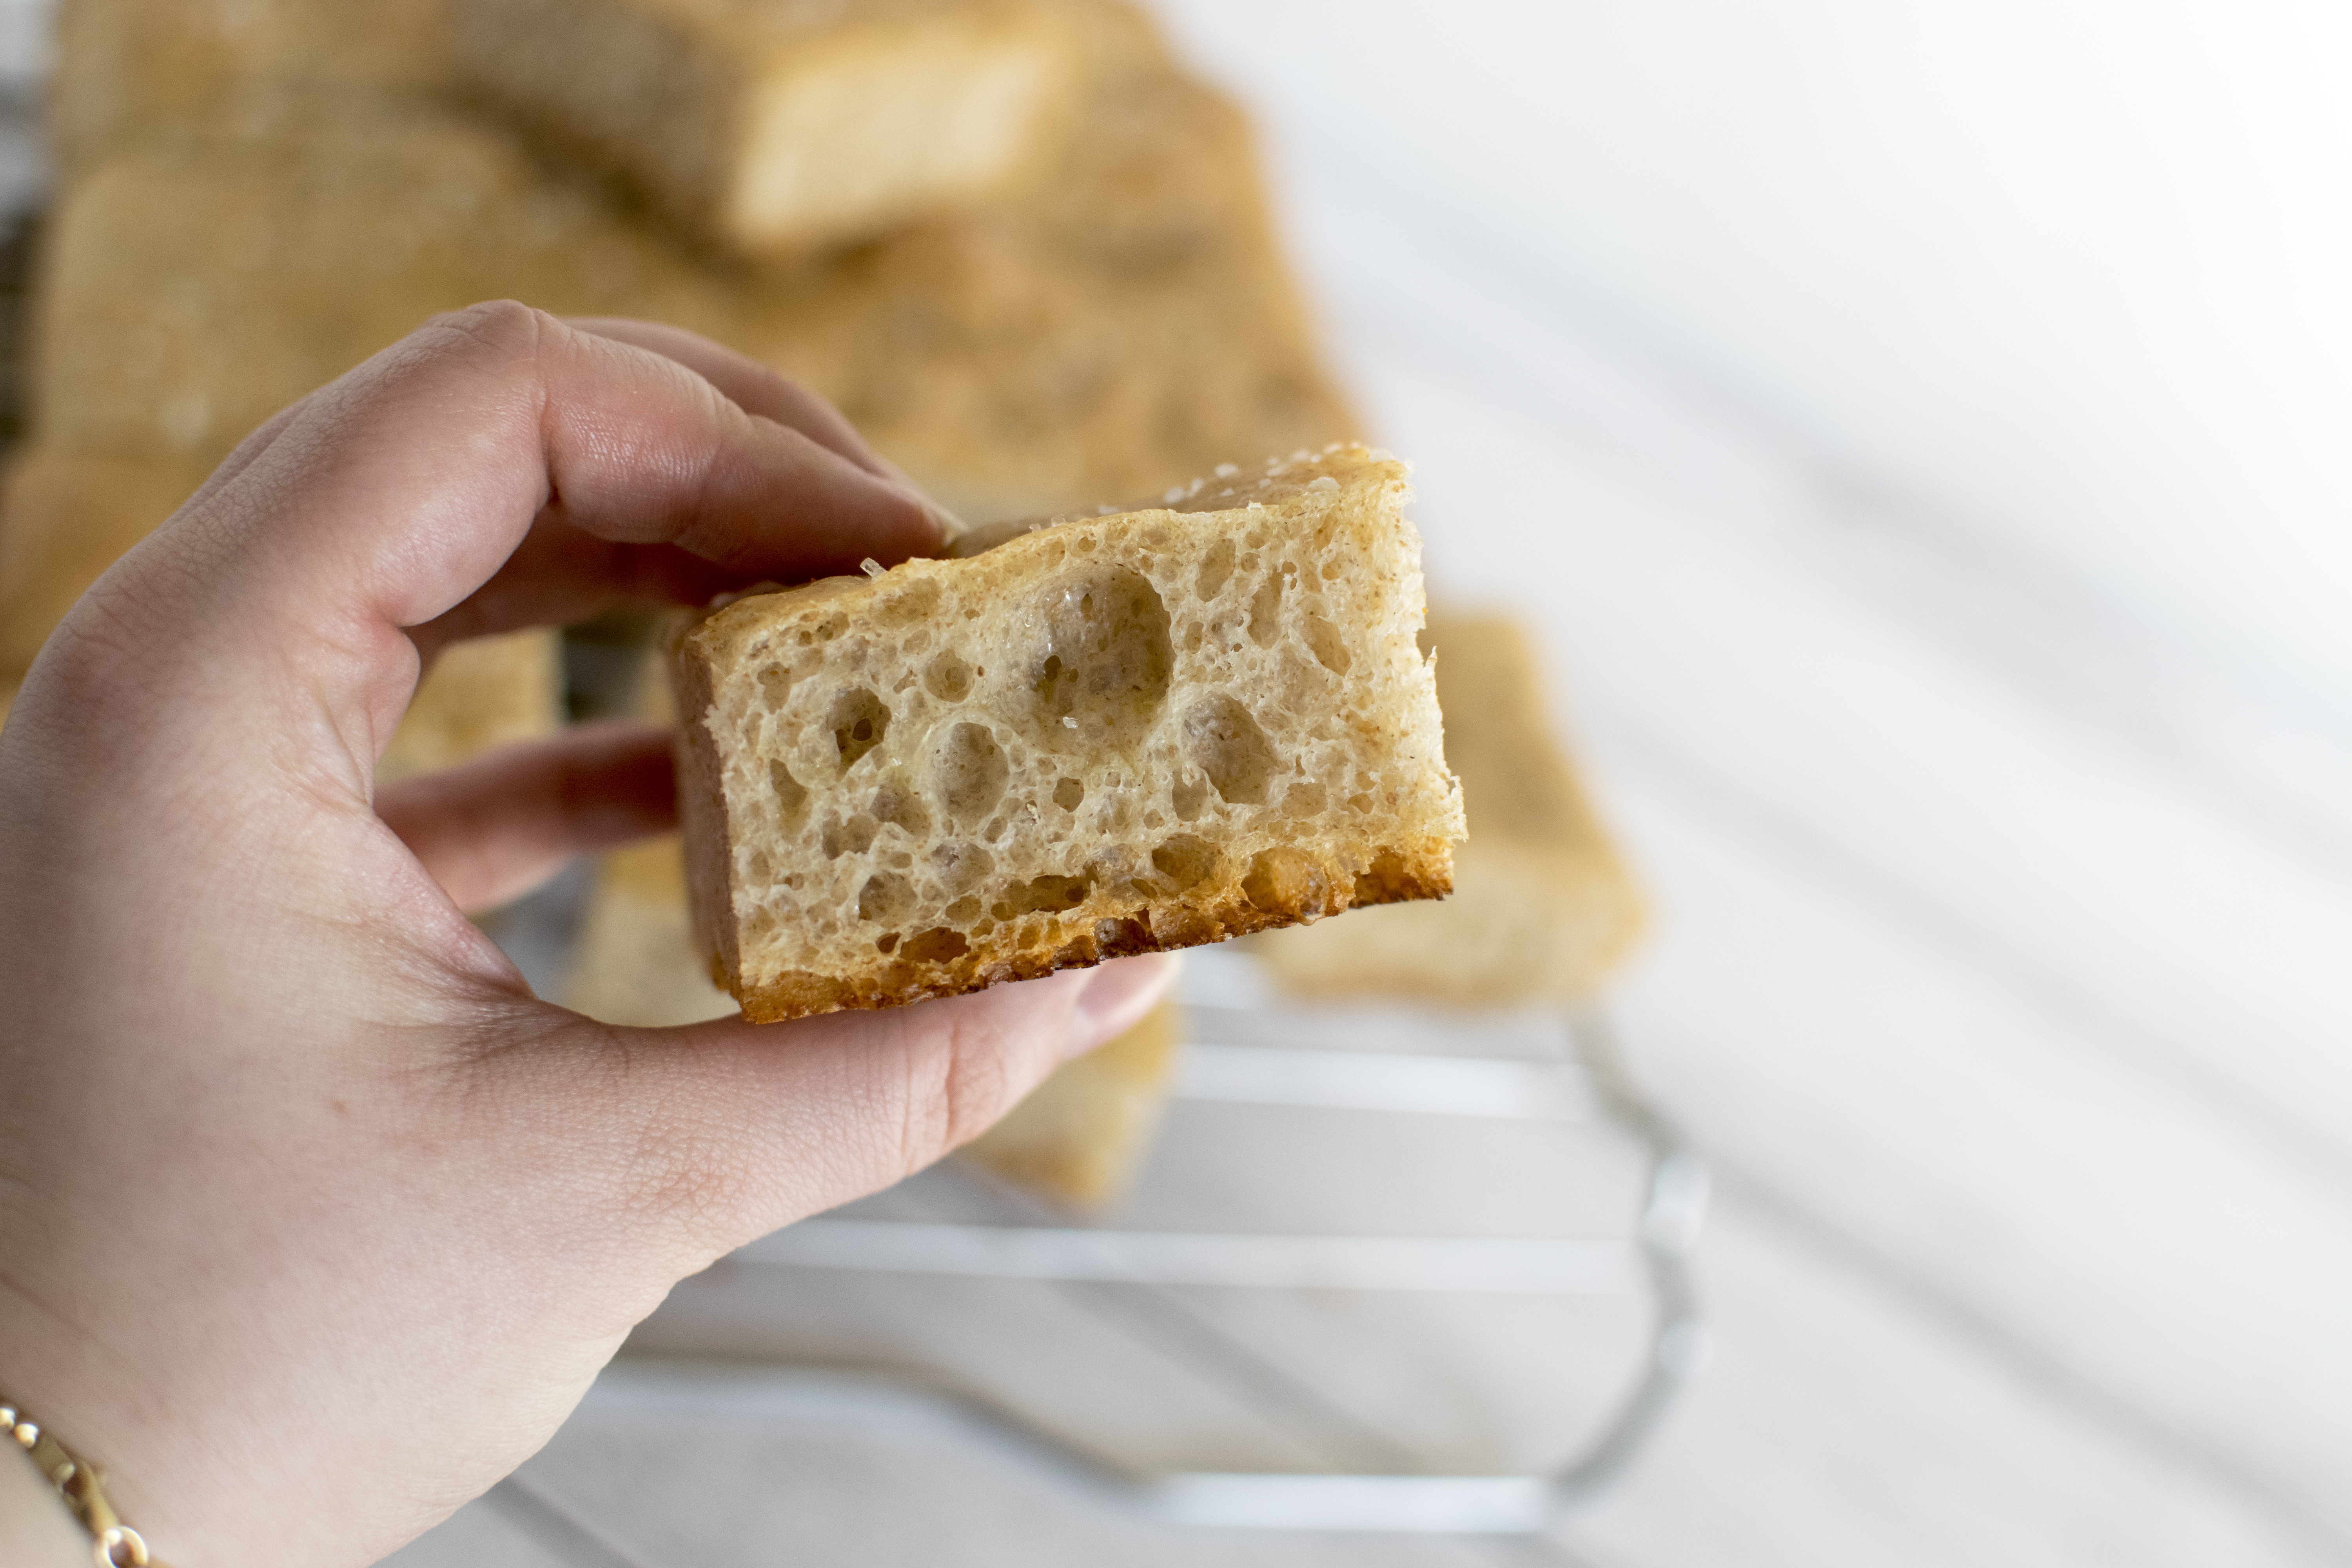
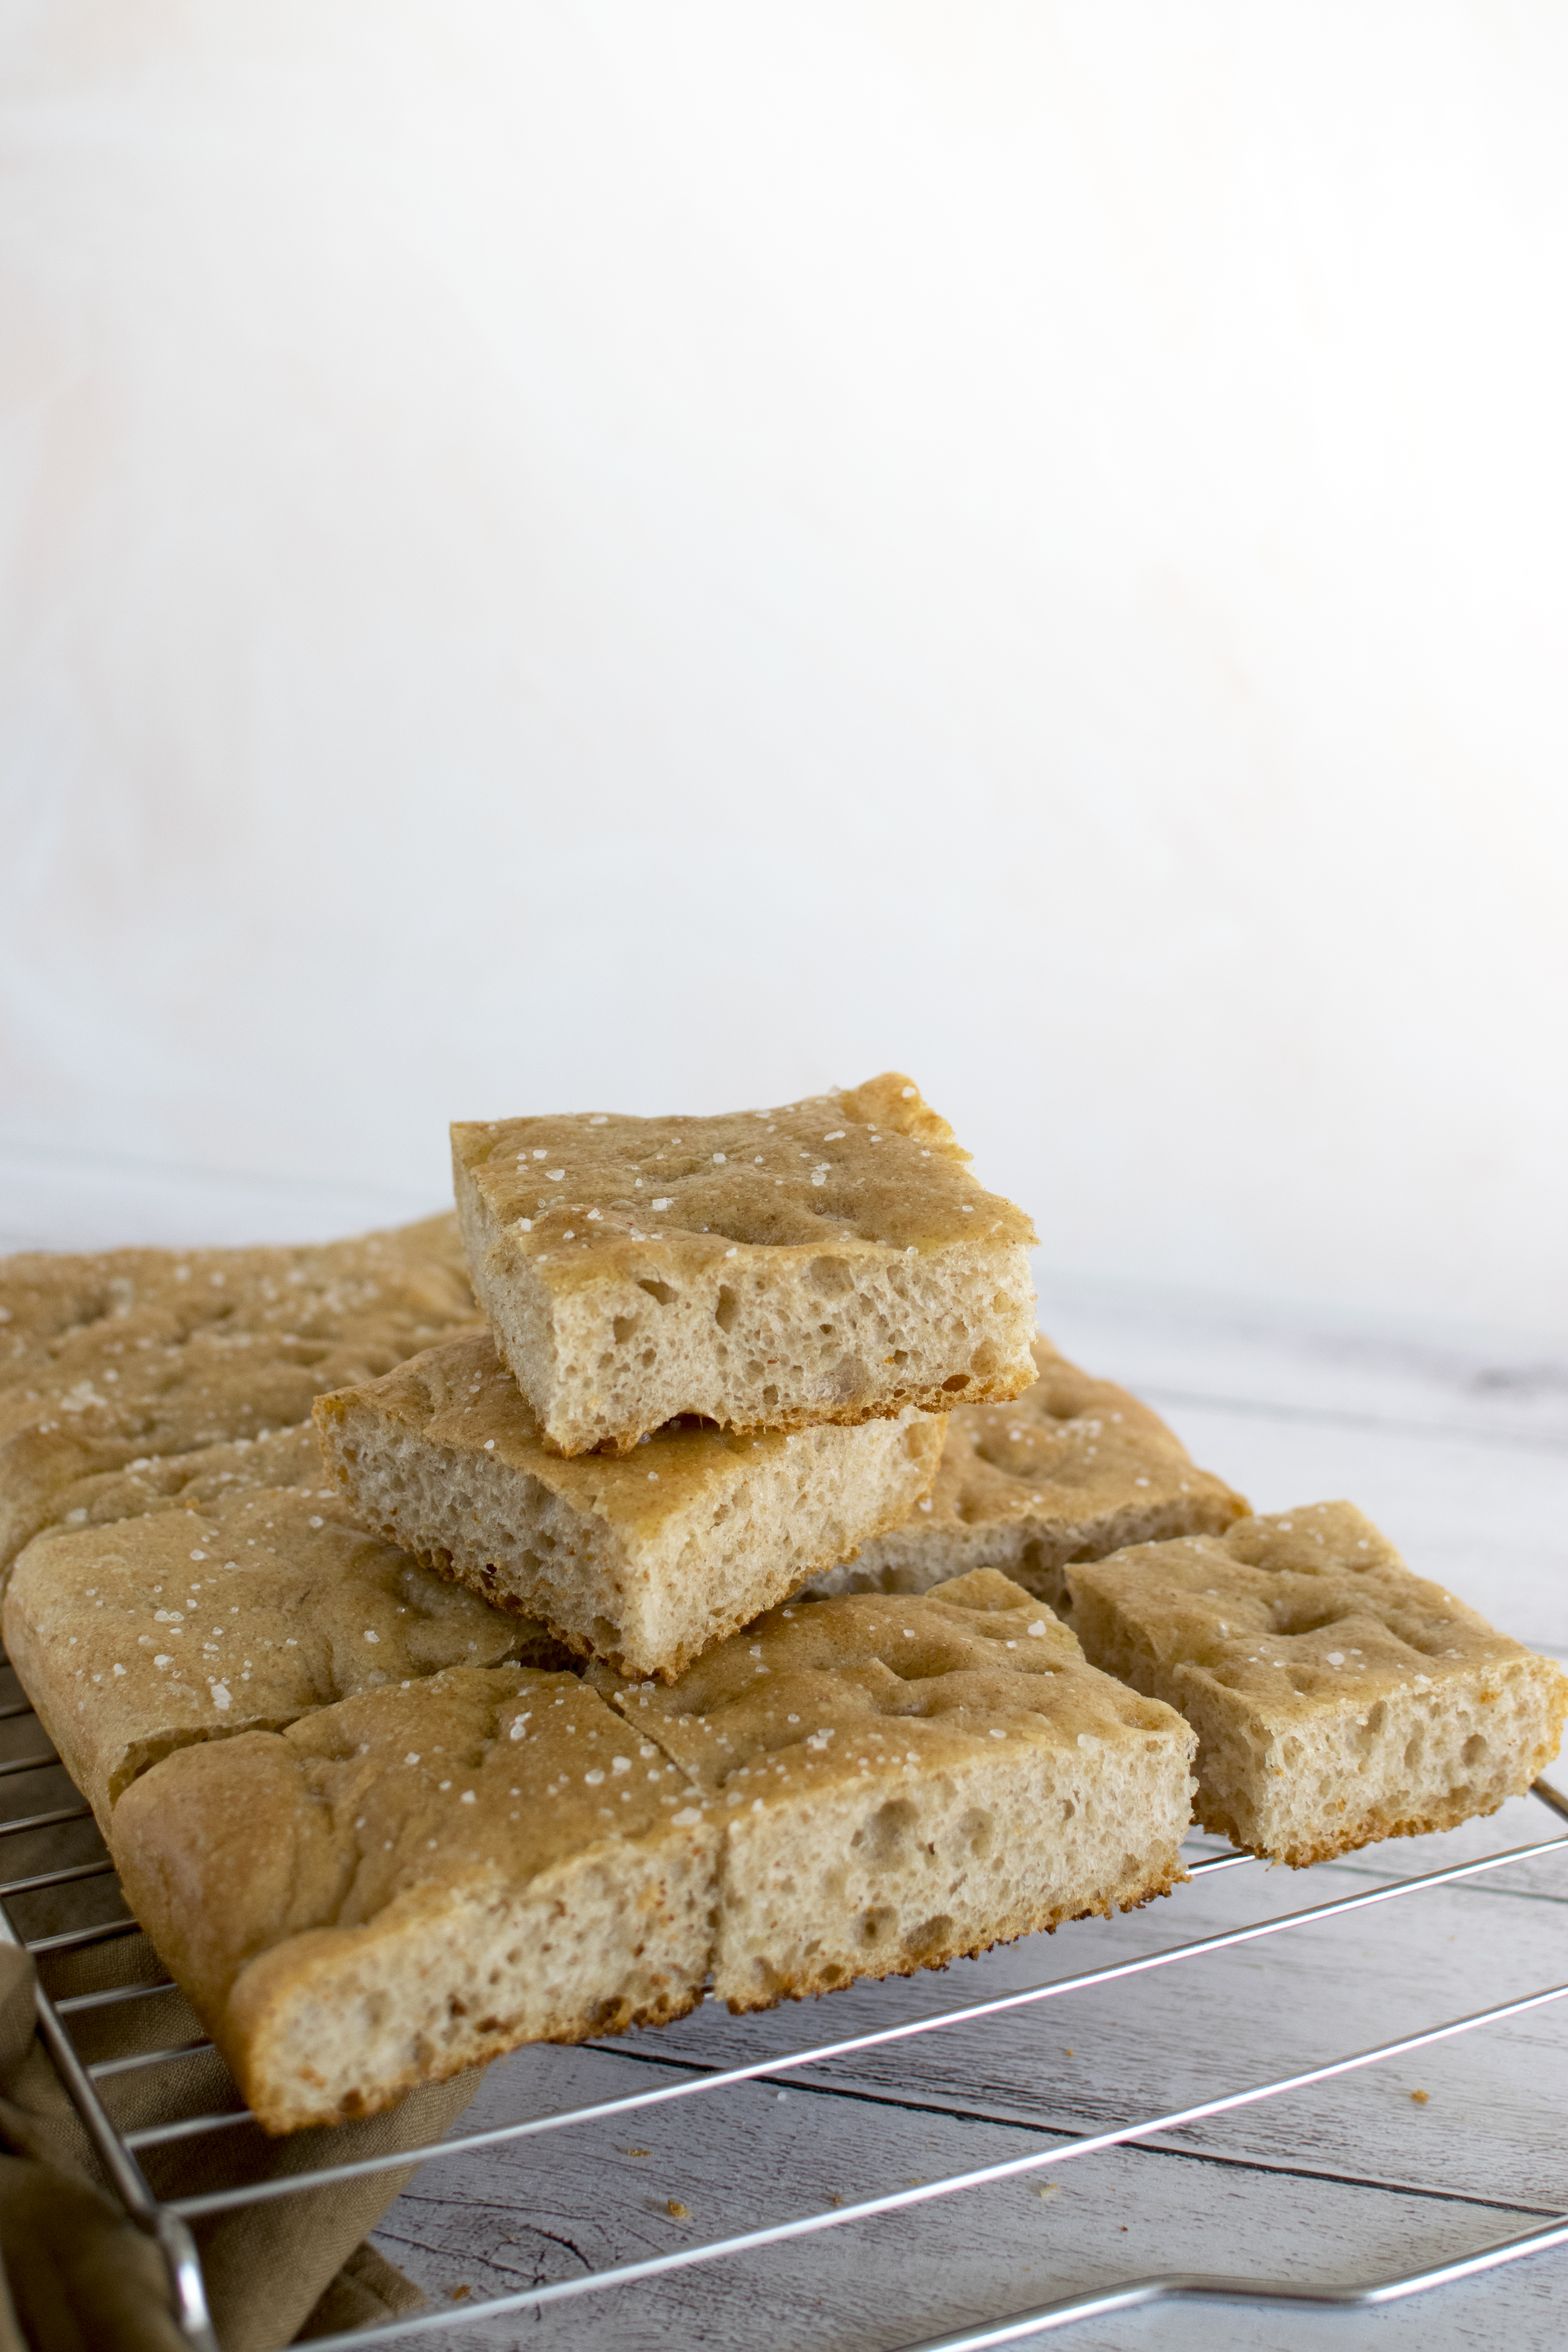
And this is it, the focaccia is done. I really like this overnight proofing method; it really goes well with my schedule, and the results are just way better than when I make it in the same day. The texture of the crumb is amazing, it is airy. This also allows us to use way less yeast than in a normal recipe, because of the long fermentation process.
Plus, if you make it simple, with just some salt and olive oil, you can use it for sandwiches, and you can find my favorite recipe in my Instagram Highlights (@betterthansalads_)
Hope you try this recipe, and if you do, please let me know if you liked it or if you have any questions. See ya soon!
